 维修手册A4VG71180

《维修手册A4VG71180》由会员分享,可在线阅读,更多相关《维修手册A4VG71180(50页珍藏版)》请在装配图网上搜索。
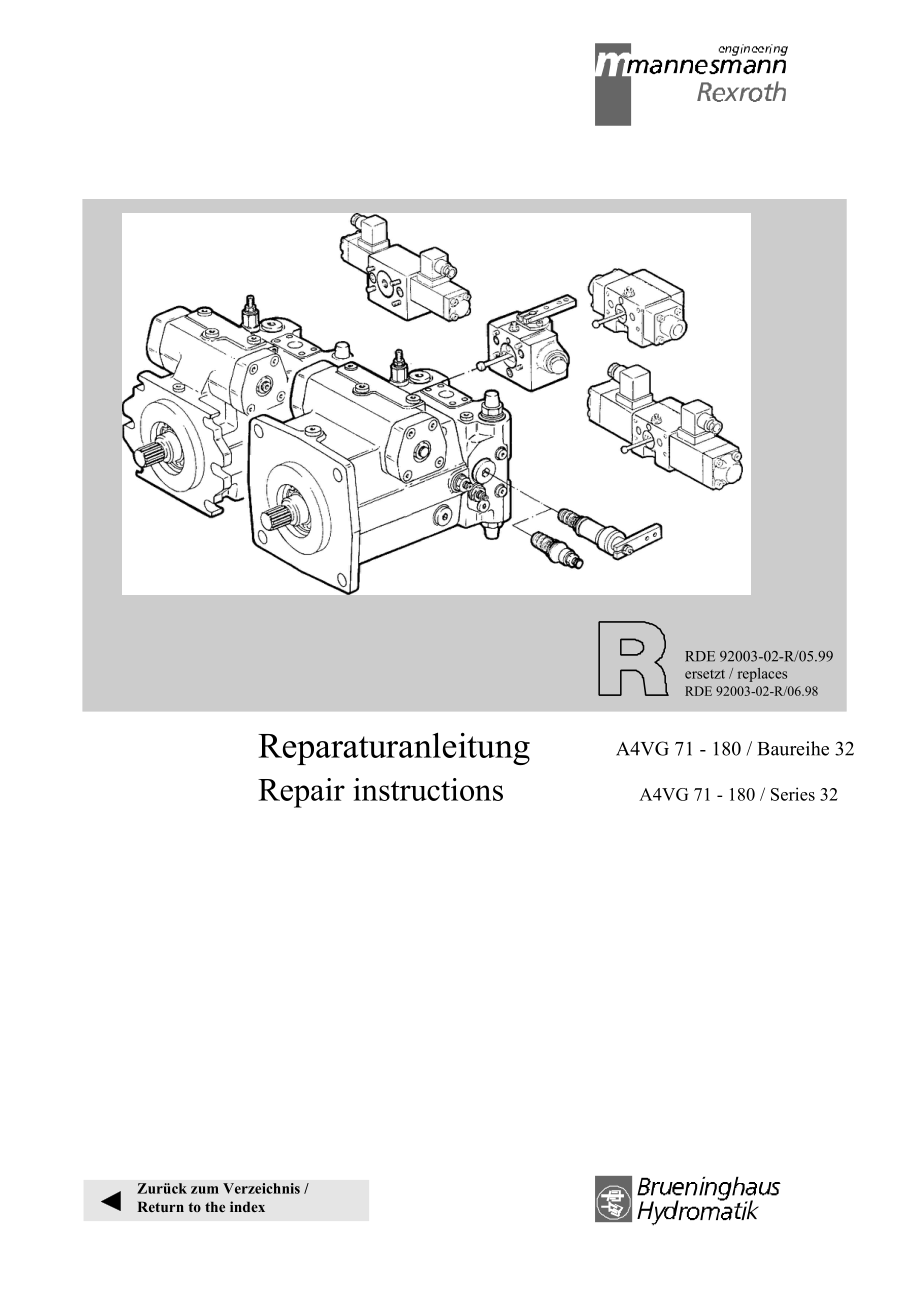
1、ReparaturanleitungRepair instructionsZurck zum Verzeichnis /Return to the indexRDE 92003-02-R/05.99ersetzt / replacesRDE 92003-02-R/06.98A4VG 71 - 180 / Baureihe 32A4VG 71 - 180 / Series 32RDE 92003-02-R/05.99Hinweis / InhaltNotice / ContentsHINWEISNOTICEReparaturanleitung A4VGRepair Instructions A4
2、VGBezeichnungen, Beschreibungen und Darstellungenentsprechen dem Informationsstand zum Zeitpunkt derDrucklegung dieser Unterlage.nderungen knnen den Service am Produkt beein-flussen, Verpflichtungen entstehen uns daraus nicht.Methoden und Vorrichtungen sind Empfehlungen, frderen Resultat wir keine H
3、aftung bernehmen knnen.BRUENINGHAUS HYDROMATIK- Baugruppen, mit Anga-be der Fabrik-Nr. bestellt, sind die Basis guter Reparatu-ren.Einstell- und Prfarbeiten sind bei Betriebstemperatur aufdem Teststand vorzunehmen.Schutz von Personen und Eigentum ist durch Vor-kehrungen sicherzustellen.Sachkenntnis,
4、 die Voraussetzung fr jede Service-arbeit,vermitteln wir in unseren Schulungskursen.Specifications, descriptions and illustrative materialshown herein were as accurate as known at the time thispublication was approved for printing.BRUENINGHAUS HYDROMATIK reserves the right todiscontinue models or op
5、tions at any time or to changespeci-fications, materials, or design without notice andwith-out incurring obligation.Optional equipment and accessories may add cost to thebasic unit, and some options are available only incombination with certain models or other options.For the available combinations
6、refer to the relevant datasheet for the basic unit and the desired option.Adjustment and tests have to be carried out on the testbench under operating temperatures.Protection of personnel and property has to be guar-anteed by appropriate measures.Expert knowledge, the precondition of any service wor
7、k,can be obtained in our training courses.INHALTA4VGSchnittbildTurcon-Glyd-Ring DichtungAllgemeine ReparaturhinweiseDichtstze und BaugruppenTriebwelle abdichtenHilfspumpe abdichtenStellkolbendeckel abdichtenSpeisedruckventil abdichtenDruckbegrenzungsventil abdichtenDruckabschneidung abdichtenAnsteue
8、rgert abdichtenAnsteuergert HWAnsteuergert HDAnsteuergert EPAnsteuergert DARegelventil abdichten / berprfenPumpe demontierenVerstellung demontierenZylinder demontierenberprfungshinweiseStellkolben, Triebwerk montierenTriebwerk einbauenPumpe montierenAnziehdrehmomenteSicherheitsbestimmungenEinstellhi
9、nweise2 Brueninghaus HydromatikSeite/Page3-4567-9101112-1314151617181920212223-2526-272829-3031-3334-3738-404142-4344-50CONTENTSA4VGSectional viewTurcon-Glyd-ring sealGeneral repair instructionsSeal kits and sub assembly groupsSealing of the drive shaftSealing of the boost pumpSealing of the control
10、 piston coverSealing of the boost pressure valveSealing of the pressure relief valve HDSealing of the pressure cut-off valveSealing of the control deviceControl device HWControl device HDControl device EPControl device DASealing of the regulator valvePump disassemblyDismantling of the controlDismant
11、ling of the cylinderInspection notesPositioning piston, rotary group assemblyInstallation of the rotary groupAssembly of the pumpTightening torquesSafety regulationsAdjustment instructionsSchnittbildSectional viewHW/DEP/DHD/DRDE 92003-02-R/05.99Reparaturanleitung A4VGRepair Instructions A4VGBruening
12、haus Hydromatik 3RDE 92003-02-R/05.99SchnittbildSectional viewDA/D4 Brueninghaus HydromatikReparaturanleitung A4VGRepair Instructions A4VGTurcon-Glyd-Ring DichtungTurcon-Glyd-ring sealDeckelFhrungsbuchseTurcon-Glyd-RingPumpengehuseRDE 92003-02-R/05.99Reparaturanleitung A4VGRepair Instructions A4VGSt
13、elldruckStellzylinderLecklBei den Verstellpumpen A4VG erfolgt zur Zeit die Umstel-lung der Verstellung auf Turcon-Dichtungen.Die Stckliste der kompletten Einheit erhlt dabei eineneue Ident.- Nummer.Typenschlssel, Typnummer und Auenabmeungenbleiben dabei unverndert. (Pumpengehuse ndert sichnur im Ber
14、eich vom Stellkolben. Stellkolben ndert sich ineine angefaste Ausfhrung).Alten Stellkolben nicht bei Turcon-Dichtung ver-wenden (scharfkantig - Dichtungen werdenbeschdigt).Pumpengehuse / Pump housingAt present the change of the control into Turcon seal ismade for A4VG.The parts list of the complete
15、unit will receive a newidentification number.Type reference and outside dimensions remainunchanged (pump housing will change at the area of thepositioning piston. Positioning piston will change intochamfering design).Do not use old positioning piston with Turcon seal(sharp edged - seal will be damag
16、ed)Pumpengehuse / Pump housingmit Lagerbuchse / with bushALT / OLD*mit Turcon-Dichtung / with Turcon seal NEU / NEW*Die Umstellung der Verstellung auf Turcon-Dichtung ist im allgemeinen mit einer Funktions-verbesserung verbunden (DA-Verhalten, geringererTemperatureinflu auf Stellzeiten).Bei gleicher
17、 Dsenbestckung knnen sich dieStellzeiten geringfgig verndern.The change of the control into Turcon seal designimproves in general the function (DA-behaviour,lower temperature-influence on control times).The control times will slightly change with thesame throttle sections. Therefore our customershav
18、e to be informed about this change.Brueninghaus Hydromatik 5RDE 92003-02-R/05.99Allgemeine ReparaturhinweiseGeneral repair instructionsAchtung!Reparaturanleitung A4VGRepair Instructions A4VG6 Brueninghaus HydromatikNachfolgend Hinweise bei allen Reparaturarbeitenan Hydraulikaggregaten beachten!Atten
19、tion!Observe the following notices when carrying out repairwork at hydraulic aggregates!Alle ffnungen der Hydraulikaggregate verschlieen.Close all ports of the hydraulic aggregates.Alle Dichtungen erneuern.Nur original HYDROMATIK-Ersatzteile verwenden.Replace all seals.Use only original HYDROMATIK s
20、pare parts.Alle Dicht- und Gleitflchen auf Verschlei prfen.Achtung: Nacharbeiten an Dichtflchen z.B. durchSchleifpapier kann die Oberflche beschdigen.Check all seal and sliding surfaces for wear.Attention: Rework of sealing area f. ex. with abrasivepaper can damage surface.Hydraulikaggregate vor Inb
21、etriebnahme mitBetriebsmedium befllen.Fill up hydraulic aggregates with mediumbefore start- up.Dichtstze und BaugruppenSeal kits and sub assembly groups 1Dichtsatz fr Triebwelle.Seal kit for drive shaft. 2uerer Dichtsatz.External seal kit. 3Triebwerk komplett.Complete rotary group. 4StellkolbenPosit
22、ioning piston 5AnschluplatteValve plateRDE 92003-02-R/05.99Reparaturanleitung A4VGRepair Instructions A4VGBrueninghaus Hydromatik 7RDE 92003-02-R/05.99BaugruppenSub assemblies 6Ansteuergerte HW, HD, EPHinweis:Reparaturanleitung A4VGRepair Instructions A4VG8 Brueninghaus HydromatikNG 71 wie NG 40 - 5
23、6 mit Flachdichtung.Control device HW, HD, EPNote:Size 71 control device as size 40 - 56 with flat seal. 7Ansteuergert DAHinweis:NG 71 wie NG 40 - 56 mit Flachdichtung.Control device DANote:Size 71 control device as size 40 - 56 with flat seal. 8HilfspumpeBoost pump 9RegelventilControl valve 10HD -
24、VentilHigh pressure valveBaugruppenSub assemblies 11ND - VentilLow pressure valve 12DruckabschneidungPressure cut-offRDE 92003-02-R/05.99Reparaturanleitung A4VGRepair Instructions A4VGBrueninghaus Hydromatik 9RDE 92003-02-R/05.99Triebwelle abdichtenSealing of the drive shaft 14Triebwelle abkleben.Si
25、cherungsring ausbauen.Protecting the drive shaft.Remove retaining ring.Reparaturanleitung A4VGRepair Instructions A4VG1310 Brueninghaus Hydromatik 15Blechschraube in die mit Gummi geflltenLcher eindrehen.Mit Zange WDR herausziehen.Screw in sheet metal screw into the holesfitted with rubber.Pull out
26、shaft seal with pliers.16Wellendichtring mit Buchse aufAnschlag einpressen.Sicherungsring einbauen.Press-in shaft seal with bush to stop.Assemble retaining ring.Hilfspumpe abdichtenSealing of the boost pumpAchtung!RDE 92003-02-R/05.99Reparaturanleitung A4VGRepair Instructions A4VG* Angefaste Seite z
27、um Deckel montieren.Note!* Mount chamfered side facing cover. 18Lage kennzeichnen,Befestigungsschrauben ausbauen.Mark position,remove fixing screws. 19Deckel abdrcken.Pry-off cover. 20Kontrolle:O-Ring, Nut,Laufflche, Anschluplatte.Check:O-ring, groove,gliding surface, connection plate.17Brueninghaus
28、 Hydromatik 11RDE 92003-02-R/05.99Stellkolbendeckel abdichtenSealing of the control piston coverAchtung!Reparaturanleitung A4VGRepair Instructions A4VG12 Brueninghaus HydromatikKorrekt mechanische 0-Lageneinstellung berprfenAttention!Check correct mechanical 0-position. 22Lage kennzeichnen.Mark posi
29、tion. 23Deckel verdrehen und mit leichten Hammerschlgen lsen.Rotate cover and release by tapping gently with hammer.21Stellkolbendeckel abdichtenSealing of the control piston coverRDE 92003-02-R/05.99Reparaturanleitung A4VGRepair Instructions A4VG 24Deckel kennzeichnen. Ma festhalten, Kontermutter l
30、sen,Stellschraube gegenhalten.Mark cover. Must be fixed, loosen counter nut,hold adjustment screw. 25Deckel demontieren.Remove cover. 26Deckel von Stellschraube abschrauben.Lift off by turning the setting screw. 27Kontrolle!O-Ring (1), Nut (2), Gehuse (3).Check!O-ring (1), groove (2), housing (3).Br
31、ueninghaus Hydromatik 13RDE 92003-02-R/05.99Speisedruckventil abdichtenSealing of the boost pressure valve 29Ventil komplett ausbauen.Hinweis:Einstellschraube nicht verndern.Achtung!Reparaturanleitung A4VGRepair Instructions A4VG2814 Brueninghaus HydromatikNach Einbau Ventileinstellung berprfen!Remo
32、ve valve completely:Note:Do not change adjustment screw.Attention!Check valve setting after installation.Druckbegrenzungsventil abdichtenSealing of the pressure relief valve HD 31Ventil komplett ausbauen.Kontrolle: O-Ring, Gehuse.RDE 92003-02-R/05.99Reparaturanleitung A4VGRepair Instructions A4VG30W
33、echsel der Dichtmutter - Einstellma (*) festhalten.Achtung!Nach Einbau Ventileinstellung berprfen.Remove valve completely.Control: O-ring, housing.Replacement of the tightening nut, record measure (*).Attention!After assembly check valve setting.Brueninghaus Hydromatik 15RDE 92003-02-R/05.99Druckabs
34、chneidung abdichtenSealing of the pressure cut-off 33Einstellteil komplett ausschrauben.Kontrolle: O-Ring, Gehuse.Reparaturanleitung A4VGRepair Instructions A4VG3216 Brueninghaus HydromatikWechsel der Dichtmutter - Einstellma (*) festhalten.Achtung!Nach Einbau Ventileinstellung berprfen.Unscrew sett
35、ing cartridge completely.Control: O-ring, housing.Replacement of the tightening nut, record measure (*).Attention!After assembly check valve setting.Ansteuergert abdichtenSealing of the control deviceNG 71 . 125NG 180DAAnsteuergert abbauen.Remove control device.Hinweis:HWDARDE 92003-02-R/05.99Repara
36、turanleitung A4VGRepair Instructions A4VGHDEPNG 71: Abdichtung der Ansteuergerte wie NG 40 - 56mit Flachdichtung.Achtung!Korrekte hydraulische Nullageneinstellung berprfen.Note:Size 71: Sealing of control device as size 40 - 56with flat seal.Attention!Check correct hydraulic 0-position.34Brueninghau
37、s Hydromatik 17RDE 92003-02-R/05.99Ansteuergert HWControl device HW18 Brueninghaus HydromatikReparaturanleitung A4VGRepair Instructions A4VG35Kontrolle:O-Ringe und Dichtung.Check:O-rings, gasket.36Ansteuergert HDControl device HDRDE 92003-02-R/05.99Reparaturanleitung A4VGRepair Instructions A4VGKont
38、rolle:O-RingeCheck:O-rings3738Brueninghaus Hydromatik 19RDE 92003-02-R/05.99Ansteuergert EPControl device EP20 Brueninghaus HydromatikReparaturanleitung A4VGRepair Instructions A4VGKontrolle:O-Ringe und Dichtung.Check:O-rings, gasket.3940Ansteuergert DAControl device DAAblaufdrosselRDE 92003-02-R/05
39、.99Reparaturanleitung A4VGRepair Instructions A4VGKontrolle:O-RingeCheck:O-rings4142Brueninghaus Hydromatik 21RDE 92003-02-R/05.99Regelventil abdichten/berprfenSealing of the regulator valve22 Brueninghaus Hydromatik 44Blende berprfen.Keine Beschdigung.Inspect orifice.No damage.45Gewinde abkleben.O-
40、Ring einsetzen.Cover threads.Insert O-ring.Reparaturanleitung A4VGRepair Instructions A4VG43Pumpe demontierenRemoving of the pumpVerdrillschraubeRDE 92003-02-R/05.99Reparaturanleitung A4VGRepair Instructions A4VGVerschluschraube / StiftLocking screw / pinTiming adjustment screw 47Ansteuergert abbaue
41、n.Remove control device.48Hilfspumpe ausbauen.Hinweis:Einbaulage kennzeichnen.Remove auxiliary pump.Note:Mark assembly position previously.46Brueninghaus Hydromatik 23RDE 92003-02-R/05.99Pumpe demontierenPump disassembly24 Brueninghaus HydromatikReparaturanleitung A4VGRepair Instructions A4VG 49Lage
42、 der Verdrillschraube markieren (1).Einstellma festhalten.Verdrillschraube auf Demontageposition stellen (2).Mark the position of the indexing screw (1).Record setting measure.Set the indexing screw to disassembly position (2). 50Lage der Hilfspumpe und Anschluplatte markieren.Anschluplattenbefestig
43、ung lsen.Mark position of the connection plate.Loosen connection plate fixation. 51Anschluplatte und Steuerplatte abheben.Lift off port plate and control plate. 521. Zylinder nach unten drcken.2. Verdrillschraube herausdrehen.1. Press the cylinder to the bottom.2. Remove fixing indexing screw. 53Zyl
44、inder komplett mit Kolben undRckzugeinrichtung ausbauen.Push off hydraulic section of rotary group.Pumpe demontierenPump disassembly 54Seegerring / WDR ausbauen.RDE 92003-02-R/05.99Reparaturanleitung A4VGRepair Instructions A4VGRemove retaining ring and radial seal ring. 55Triebwelle mit leichten Hammerschlgen austreiben.Remove drive shaft with slide hammer strokes. 56Schwenkwiege / Lager komplett ausbauen.Remove swash plate / bearing cups.
- 温馨提示:
1: 本站所有资源如无特殊说明,都需要本地电脑安装OFFICE2007和PDF阅读器。图纸软件为CAD,CAXA,PROE,UG,SolidWorks等.压缩文件请下载最新的WinRAR软件解压。
2: 本站的文档不包含任何第三方提供的附件图纸等,如果需要附件,请联系上传者。文件的所有权益归上传用户所有。
3.本站RAR压缩包中若带图纸,网页内容里面会有图纸预览,若没有图纸预览就没有图纸。
4. 未经权益所有人同意不得将文件中的内容挪作商业或盈利用途。
5. 装配图网仅提供信息存储空间,仅对用户上传内容的表现方式做保护处理,对用户上传分享的文档内容本身不做任何修改或编辑,并不能对任何下载内容负责。
6. 下载文件中如有侵权或不适当内容,请与我们联系,我们立即纠正。
7. 本站不保证下载资源的准确性、安全性和完整性, 同时也不承担用户因使用这些下载资源对自己和他人造成任何形式的伤害或损失。
