 GIS的二次开发——使用pb调用mapx控件

《GIS的二次开发——使用pb调用mapx控件》由会员分享,可在线阅读,更多相关《GIS的二次开发——使用pb调用mapx控件(17页珍藏版)》请在装配图网上搜索。
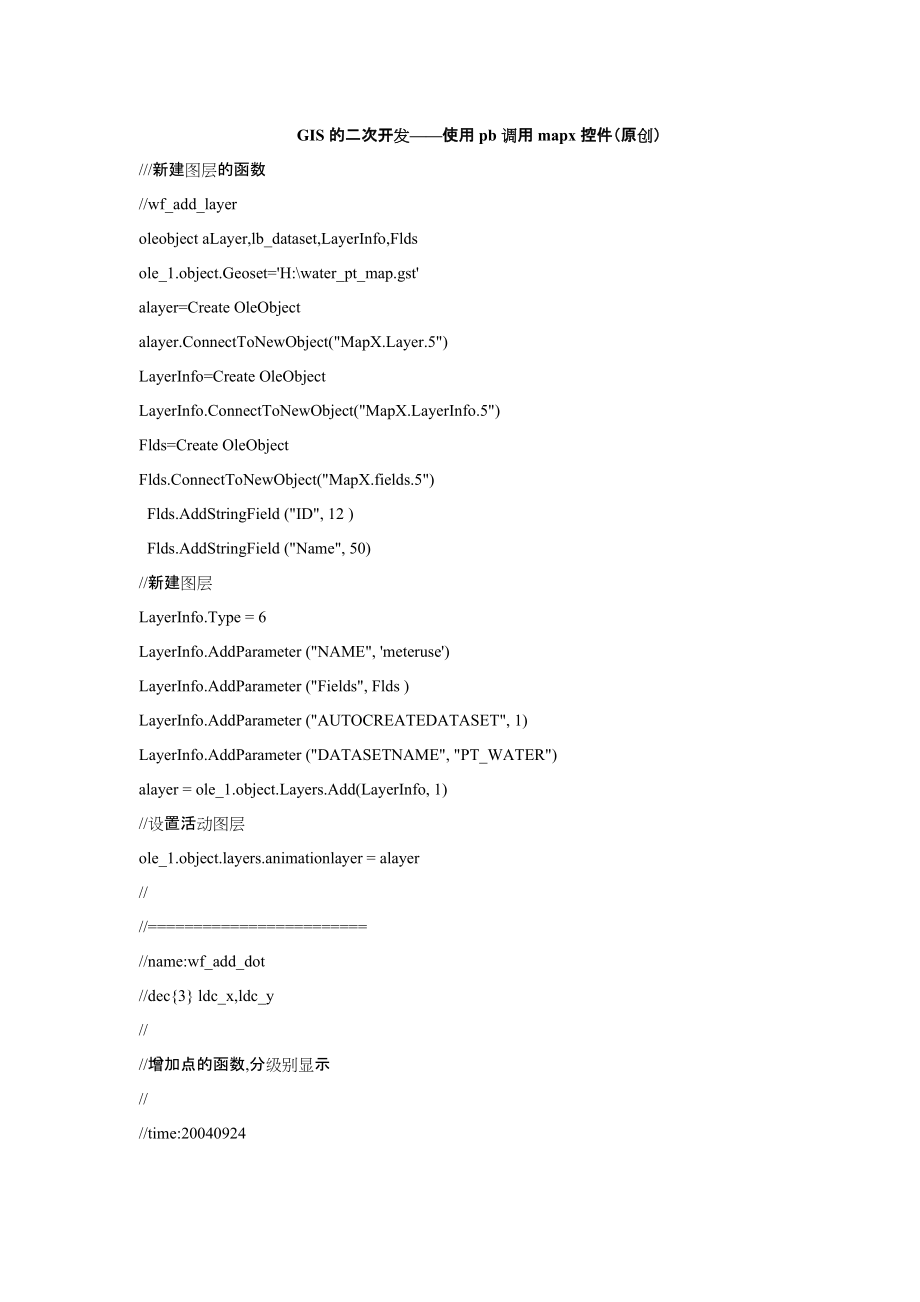
1、GIS的二次开发使用pb调用mapx控件(原创)/新建图层的函数/wf_add_layeroleobject aLayer,lb_dataset,LayerInfo,Fldsole_1.object.Geoset=H:water_pt_map.gstalayer=Create OleObject alayer.ConnectToNewObject(MapX.Layer.5)LayerInfo=Create OleObject LayerInfo.ConnectToNewObject(MapX.LayerInfo.5)Flds=Create OleObject Flds.ConnectToNew
2、Object(MapX.fields.5) Flds.AddStringField (ID, 12 ) Flds.AddStringField (Name, 50)/新建图层LayerInfo.Type = 6LayerInfo.AddParameter (NAME, meteruse) LayerInfo.AddParameter (Fields, Flds )LayerInfo.AddParameter (AUTOCREATEDATASET, 1)LayerInfo.AddParameter (DATASETNAME, PT_WATER)alayer = ole_1.object.Laye
3、rs.Add(LayerInfo, 1)/设置活动图层ole_1.object.layers.animationlayer = alayer /=/name:wf_add_dot/dec3 ldc_x,ldc_y/增加点的函数,分级别显示/time:20040924/=long ll_f/按照级别设置颜色if il_jb = 1 thenole_1.object.DefaultStyle .SymbolCharacter = 35ole_1.object.DefaultStyle .SymbolFontColor = RGB(255, 0, 0)ole_1.object.DefaultStyl
4、e .SymbolFont.Size = 12/ole_1.object.DefaultStyle .SymbolFont=Map Symbolsole_1.object.DefaultStyle .textFontColor = RGB(255, 0, 0)ole_1.object.DefaultStyle .textFont.Size = 12ole_1.object.DefaultStyle .textFont=宋体 elseif il_jb = 2 then ole_1.object.DefaultStyle .SymbolCharacter = 36ole_1.object.Defa
5、ultStyle .SymbolFontColor = RGB(255, 255, 0)ole_1.object.DefaultStyle .SymbolFont.Size = 11ole_1.object.DefaultStyle .textFontColor = RGB(255, 255, 0)ole_1.object.DefaultStyle .textFont.Size = 11 elseif il_jb = 3 thenole_1.object.DefaultStyle .SymbolCharacter = 37ole_1.object.DefaultStyle .SymbolFon
6、tColor = RGB(255, 127, 0)ole_1.object.DefaultStyle .SymbolFont.Size = 10ole_1.object.DefaultStyle .textFontColor = RGB(255, 127, 0)ole_1.object.DefaultStyle .textFont.Size = 10 end ifint i,n=1oleobject f,f2,lb_dataset,flds,rvoleobject aLayeroleobject m_pointlb_dataset=Create OleObject lb_dataset.Con
7、nectToNewObject(MapX.dataset.5)flds=Create OleObject flds.ConnectToNewObject(MapX.fields.5)rv=Create OleObject rv.ConnectToNewObject(MapX.rowvalue.5)alayer=Create OleObject /(mapx.layer.5)f=Create OleObjectf2=Create OleObjectm_point =Create OleObjectalayer.ConnectToNewObject(MapX.Layer.5)ll_f = f.Co
8、nnectToNewObject(MapX.Feature.5)ll_f = f2.ConnectToNewObject(MapX.Feature.5)ll_f = m_point.ConnectToNewObject(MapX.point.5)aLayer=ole_1.object.layers.item(meteruse)lb_dataset = aLayer.Datasets.Item(PT_WATER)flds=lb_dataset.FieldsaLayer.LabelProperties.Dataset =lb_datasetaLayer.LabelProperties.DataFi
9、eld =lb_dataset.Fields.Item(id)aLayer.autolabel=trueaLayer.Editable=Trueif is_name and not isnull(is_name) thenif il_same_f = 1 then/已经在地图上存在的 移动坐标 f = aLayer.GetFeatureByKey (is_FeatureKey) f.point.Set(adc_x ,adc_y) f.update() else/没有存在的增加之ole_1.object.AutoRedraw=Falsem_point.Set(adc_x ,adc_y)f = o
10、le_1.object.featurefactory.createsymbol(m_point,ole_1.object.defaultstyle) aLayer.KeyField= Flds.Item(1).Name f.KeyValue=is_name f2=aLayer.addfeature(f)is_FeatureKey =f2.FeatureKeyil_same_f = 1end ifaLayer.Refreshole_1.object.AutoRedraw=trueend if/=/name :wf_delete_feature/string as_featruekey/删除地图上
11、的一个 符号/20040913/=oleobject aLayeralayer=Create OleObject /(mapx.layer.5)alayer.ConnectToNewObject(MapX.Layer.5)aLayer=ole_1.object.layers(meteruse)aLayer.DeleteFeature(as_featruekey) aLayer.refresh摘要 本文介绍了VB中如何利用MapX创建用户定制地图工具,详细地说明了整个创建过程,以及在创建定制工具的过程中所使用的关键方法。1.前言随着地理信息系统的发展,国内外已出现了不少GIS(地理信息系统)软件
12、,其中MapX是MapInfo公司的ActiveX控件产品。由于它是一种基于Windows操作系统的标准控件,因而MapX4.0支持绝大多数标准的可视化开发环境,如:VisualBasic,Delphi,PowerBuilder,VisualC+等面向对象语言,而且可以使用Lotus Script将MapX4.0嵌入到Lotus Notes中。虽然MapX4.0提供了许多标准工具,可以直接使用,但是很多情况下,这些标准工具不能满足实际的需要,这就要求通过定制地图工具来规定工具能完成何种功能,例如画椭圆工具,标尺工具(测线段长度)等等。下面,笔者就通过一具体实例来介绍一下VB中采用MapX4.0
13、控件制作地图的定制工具。2.VB环境下MapX编程利用MapX4.0创建用户定制工具分为以下三步:2.1 创建定制工具本例创建的是画椭圆工具。首先,宣称全局常量miAddEllipseTool = 1,1就代表了画椭圆这个工具。然后,在主窗体中创建画椭圆工具。关键方法(创建定制工具):OBJECT.CreateCustomTool (ToolNumber, Type, Cursor, ShiftCursor , CtrlCursor, InfoTips)OBJECT(对象):Map对象;ToolNumber(工具号)是创建出代表画椭圆工具的miAddEllipseTool;Type(类型):描
14、述了工具的行为,这个参数取的ToolTypeConstants(工具类型常量)值。本例,工具是按下鼠标左键到弹上鼠标左键的过程中画椭圆。本例中取的是miToolTypePoint;Cursor(指针形状):使用该工具时,该工具在地图上显示的形状,该参数从CursorConstants(指针常量)中取值。本例选用的是miCrossCursor,那么当选择该工具时,该工具将在地图上显示成十字叉形状;ShiftCursor ,CtrlCursor:这两个参数是可选的,缺省情况时,SHIFT键和CTRL键不起作用;InfoTips(工具提示): Boolean型。 如果要显示工具提示,需要将此参数设为
15、true;缺省值为false。实际编码:Public Const miAddEllipseTool = 1 定制的加椭圆工具Public RectX1 As Double 新加椭圆(所需的矩形)的点1的X(经纬度)坐标Public RectY1 As Double 新加椭圆(所需的矩形)的点1的Y(经纬度)坐标Public RectX2 As Double 新加椭圆(所需的矩形)的点2的X(经纬度)坐标Public RectY2 As Double 新加椭圆(所需的矩形)的点2的Y(经纬度)坐标Private Sub Form_Load() 创建定制工具Map1.CreateCustomToo
16、l miAddEllipseTool, _miToolTypePoint, miCrossCursorEnd Sub此时所创建的工具没有任何功能,要工具具备相应的功能由第二步实现。2.2编写工具句柄 (工具具备什么功能)。当按下鼠标左键时,需要记下椭圆的起始位置;当鼠标右键弹上时,需要记下椭圆的结束位置,这时,画出椭圆。椭圆将以这两点为矩形的对角线在矩形框中绘制椭圆。需要特别注意的是,MapX4.0中使用的坐标系统是经/纬度系统,而MouseDOwn,MouseUp事件中的坐标是屏幕坐标,因此,需要将屏幕坐标转化为经/纬度坐标,所画椭圆才能显示在正确的位置上。关键方法(绘制椭圆):OBJECT
17、.CreateEllipticalRegion(Rectangle,Angle , Resolution , Style )OBJECT:FeatureFactory对象;Rectangle(矩形):Rectangle对象,确定了椭圆的大小;Angle(角度):变量,决定椭圆绕中心点旋转的角度;Resolution(精度) :变量, 椭圆的精度,由多少点构成;Style(样式): 变量,定义了所画椭圆的样式,如颜色,线型等。实际编码:Private Sub Map1_MouseDown(Button As Integer, Shift As Integer, X As Single, Y As
18、 Single)If Button = vbLeftButton And (Map1.CurrentTool = miAddEllipseTool) ThenMap1.NumericCoordSys.Set miLongLat, 0将屏幕坐标转变为经纬度坐标Map1.ConvertCoord X, Y, RectX1, RectY1, miScreenToMapEnd ifEnd Sub Private Sub Map1_MouseUp(Button As Integer, Shift As Integer, X As Single, Y As Single)If Button = vbLef
19、tButton And (Map1.CurrentTool = miAddEllipseTool) Then将地图的坐标系统设为经/纬度坐标Map1.NumericCoordSys.Set miLongLat, 0将屏幕坐标转变为经纬度坐标Map1.ConvertCoord X, Y, RectX2, RectY2, miScreenToMap鼠标弹起时,画椭圆 Call AddEllipse(form1,RectX1,RectY1,RectX2,RectY2)EndifEnd sub画椭圆过程Public Sub AddEllipse(frm As Form, x1 As Double, _
20、y1 As Double,x2 As Double,y2 As Double, EditLayer As Variant)Dim RECT As New MapXLib.Rectangle 画椭圆的矩形框Dim CreatedEllipse As Feature 所画的椭圆Dim I as integer,EditLayer as integer设置画椭圆的矩形框RECT.Set x1, y1, x2, y2 With frm.Map1创建椭圆Set CreatedEllipse = .FeatureFactory. _CreateEllipticalRegion(RECT, , 500, .
21、DefaultStyle)确定哪一层是可编辑层,椭圆只能画在可编辑层上 For I=1 to .map1.layers.countIf .map1.layers(I).editable=true thenEditlayer=IExit forEndifNext I将椭圆添加到所画的图层上.Layers.Item(EditLayer).AddFeature CreatedEllipseEnd WithEnd Sub此时,画椭圆工具具备了画椭圆的功能,运用定制的这个工具由第三步实现。2.3调用定制工具 设置当前工具为定制的画椭圆工具Map1.CurrentTool=miAddEllipse或 Ma
22、p1.currenttool=13. 结束语本例画椭圆时,从鼠标按下,一直到鼠标最后弹起时才可以看到椭圆出现在地图上,这就是说在鼠标移动(MouseMove事件)时,从鼠标按下,到鼠标弹起的中间过程是看不到中间过程的椭圆出现的。为了实现在鼠标移动时,也可以看到椭圆,那么需要在MouseMove事件中画椭圆,并且,每次画椭圆时删除掉前一次画的椭圆。这样的运行结果就是看到,从鼠标按下,到鼠标弹起的过程中,随鼠标的移动而有了绘椭圆的变化过程。 另外,本文是以VB5为例,进行的编程,但对于其它语言,如VC+,Delphi等,编程思路和关键方法都是相同的。上个月去天津做这个项目,加班加点忙乎过了十一,现
23、在项目终于完成了第一阶段,可以闲下来总结一下了。 在做这个项目之前我只是自学了一个月的supermap,不过感觉gis这些东西都是大同小异,没什莫可怕;关键比较郁闷的是本来根本就是做.net,现在却要用vb实在太。算了,赶鸭子上架,不会也得会呀! 其实本人对这个实在只能称得上一知半解,学的和用的一样多,不过还是给自己和别人留下点东西吧,也许会有帮助呢:) 1,设置地图标题(Map1.Title)样式 在打开一个GeoSet时,会自动显示它的标题,如果你的GeoSet没有标题,它会自动添加一个标题。 你可以设置标题的样式,显示出最完美的地图 Map1.Title.Visible = False是
24、否可见 Map1.Title.Editable = False是否可编辑 标题位置 Map1.Title.x = Map1.MapScreenWidth - 50 Map1.Title.y = 2 是否有边界 Map1.Title.Border = False 是否粗体 Map1.Title.TextStyle.TextFont.Bold = True 字体大小 Map1.Title.TextStyle.TextFont.Size = 15 是否在文本周围绘制光晕 Map1.Title.TextStyle.TextFontHalo = True 控制文本是否显示背景色 Map1.Title.T
25、extStyle.TextFontOpaque = False 是否在文本下绘制阴影 Map1.Title.TextStyle.TextFontShadow = True2 打开地图的两种方法 a,打开地图集 Map1.GeoSet =”C:aa.gst” 在地图集里,你可以给地图加颜色,加标注,限制标注的字体,颜色等。这些只能保存到地图集,而不能保存到单一的图层里。所以建议你把图层做成地图集,这样无论是打开还是显示都很方便。 b,打开图层 For i = 1 To UBound(Navigation_DefaultMap_Path) Map2.Layers.Add Navigation_De
26、faultMap_Path(i), i Next3添加数据集 mapx的地图和数据是分开的,你要想制作专题图,查看表的内容,取图元的数据,都要先添加数据集。a,添加图层数据集 Set lyr = curMap.Layers(layerList.Text) curMap.DataSets.Add miDataSetLayer, lyr, lyr.Nameb,添加自定义数据集 以下函数是添加一个数据集,sqlstr是sql语句,DsName是数据集的名称。注意: orderno,是我在数据库中取的数据集与地图图元的关联。 Private Function AddJDDs(sqlstr As Str
27、ing, DsName As String) As BooleanDim IsRight As BooleanIsRight = False-添加数据集On Error GoTo ThemedCreate-是否存在该数据集Dim ds As MapXLib.DatasetFor Each ds In Map1.DataSetsIf ds.Name = DsName ThenMap1.DataSets.Remove (DsName) 删除数据集Exit ForEnd IfNextSet ds = Nothing-加载数据集-Dim Cn As New ADODB.ConnectionDim Cm
28、d As New ADODB.CommandDim rs As New ADODB.RecordsetDim BindLyr As New BindLayerCn.CursorLocation = adUseClientCn.Open ConStrSet Cmd.ActiveConnection = CnCmd.CommandText = sqlstrrs.Open Cmd, , adOpenKeyset, adLockOptimistic BindLyr.LayerType = miBindLayerTypeNormalIf rs.RecordCount 0 ThenMap1.DataSet
29、s.Add miDataSetADO, rs, DsName, orderno, , BindLyrIsRight = TrueElseMsgBox 无法显示数据,请检查数据是否为空?IsRight = FalseEnd Ifrs.CloseSet rs = NothingCn.CloseSet Cn = Nothing Set Cmd = Nothing Set BindLyr = NothingAddJDDs = IsRightExit Function-ThemedCreate: MsgBox 加载数据集出错! 请检查数据是否正确? & Err.Description IsRight =
30、 False AddJDDs = IsRightEnd Function4关闭地图 a,关闭图层 Dim lyr As MapXLib.Layer Dim i As Integer For i = 0 To List1.ListCount - 1 If (List1.Selected(i) = True) Then Set lyr = fMainForm.Map1.Layers(List1.List(i) lyr.DataSets.RemoveAll fMainForm.Map1.Layers.Remove lyr End If Next i Set lyr = Nothing b,全部关闭
31、Map1.GeoSet = 6制作专题图 Map1.DataSets.Item(DsName).Themes.Add ThemeType, FieldList, trafficflupiebar 注意:如果是柱状图和饼图等可以是多个字段的,FieldList就是数组名;否则就是字段名。 如果你觉得制作的专题图不够大,可自己控制专题图的大小 Map1.DataSets.Item(DsName).Themes(trafficflubar).Properties.Size = 1图形的高度,默认值为 0.25 英寸 Map1.DataSets.Item(DsName).Themes(trafficf
32、lubar).Properties.BarWidth = 1每个柱体的宽度,默认值为 0.25 英寸 你可以改变专题图的图例,比如制作等级符号的专题图,默认的是#号,你可以改变成你喜欢的样式Dim oStyle As style Set oStyle = New style oStyle.SymbolFont.Size = 35 oStyle.SymbolCharacter = 35 oStyle.SymbolFont.Name = Map Symbols oStyle.SymbolFontColor = &HFF00FFMap1.DataSets.Item(DsName).Themes(tr
33、afficfluGradSymbol).Properties.SymbolStyle = oStyleSet oStyle = Nothing7自定义专题图图例 Dim LegTexts As New MapXLib.LegendTexts Dim tLegend As MapXLib.LegendSet tLegend = Map1.DataSets(DsName).Themes(trafficflubar).Legend tLegend.Title = 交通流量 tLegend.Left = Map1.MapScreenWidth - tLegend.Width tLegend.Top =
34、 Map1.MapScreenHeight - tLegend.Height tLegend.BodyTextStyle.TextFont.Size = 8 Set LegTexts = tLegend.LegendTexts tLegend.Visible = True LegTexts(1).Text = 小货 LegTexts(2).Text = 中货 LegTexts(3).Text = 大货8 邦定标注字段,自定义标注样式sqlstr是数据库取的数据集,showfield是要显示的字段名称 Sub showdatalable(sqlstr As String, showfield A
35、s String)-显示标注Dim CnShowData As New ADODB.ConnectionDim Cmd As New ADODB.CommandDim rs As New ADODB.RecordsetOn Error Resume NextCnShowData.CursorLocation = adUseClientCnShowData.Open ConStrSet Cmd.ActiveConnection = CnShowDataCmd.CommandText = sqlstrrs.Open Cmd, , adOpenKeyset, adLockOptimisticIf r
36、s.RecordCount 0 Then Map1.AutoRedraw = False rs.MoveFirst Dim lyr As MapXLib.Layer Dim ftr As MapXLib.Feature Dim obj As MapXLib.Feature Dim FId As Long Dim rvs As RowValues Dim ds As MapXLib.Dataset Dim oStyle As style Dim zi As SingleDo FId = 0 If Map1.DataSets.Count 0 Then Set lyr = Map1.Layers.I
37、tem(JDlyrName) Set ds = Map1.DataSets.Item(JDlyrName) For Each obj In lyr.AllFeatures Set rvs = ds.RowValues(obj) If Trim(rvs.Item(编号).Value) = Trim(Str(rs!orderno) Then FId = obj.FeatureID Exit For End If Next If FId 0 Then lyr.Selection.SelectByID FId, miSelectionNew 交调点对应编号 If lyr.Selection.Count
38、 0 Then Set oStyle = New style oStyle.TextFont.Size = 12 oStyle.TextFont.Bold = True oStyle.SymbolFontColor = vbWhite oStyle.TextFontBackColor = vbBlue oStyle.TextFontOpaque = True 标注的样式为蓝底白字 Map1.Annotations.AddText(rs(showfield), lyr.Selection(1).CenterX, lyr.Selection(1).CenterY, miPositionTL).Gr
39、aphic.style = oStyle End If End If Else MsgBox 请先添加数据集! Exit Sub End If Set ds = Nothing Set rvs = Nothing rs.MoveNextLoop While Not rs.EOF Map1.AutoRedraw = True Else MsgBox 无法显示数据,请检查数据是否为空? End If rs.Close Set rs = NothingCnShowData.CloseSet CnShowData = NothingEnd Sub9 删除专题图 a,隐藏专题图 ds.Themes(tr
40、afficflupiebar).Visible = False b,彻底删除 专题图是与数据集有关的,所以要先指出数据集 Dim ds As MapXLib.Dataset For Each ds In Map1.DataSets ds.Themes.RemoveAll Next10全层显示 Set fMainForm.Map1.NumericCoordSys = fMainForm.Map1.DisplayCoordSys If LayerCombo.Text = 所有图层 Then Set fMainForm.Map1.Bounds = fMainForm.Map1.Layers.Boun
41、ds Else Dim LayerName As String LayerName = LayerCombo.Text Set fMainForm.Map1.Bounds = fMainForm.Map1.Layers(LayerName).Bounds End If11改变地图比例,中心点 fMainForm.Map1.ZoomTo ViewZoom, ViewX, ViewYViewZoom地图比例;ViewX, ViewY是中心点12 查找图元 mapx查找地图上的图元有多种方法 a, FindObj.Search 这种方法在用的时候有局限性:数据集必须要有索引,查找的字段类型不能是10
42、进制类型(可能还有其它的类型,忘了),否则在图上找不到。Set FindObj = fMainForm.Map1.Layers(LayerCombo.Text).Find Set FindObj.FindDataset = fMainForm.Map1.DataSets(LayerCombo.Text & dataset) Set FindObj.FindField = FindObj.FindDataset.Fields(FieldCombo.Text) Set FoundFeature = FindObj.Search(FindText.Text)If FoundFeature.FindR
43、C Mod 10 = 1 Or FoundFeature.FindRC Mod 10 = 2 Then fMainForm.Map1.Layers(LayerCombo.Text).Selection.Add FoundFeature fMainForm.Map1.AutoRedraw = False fMainForm.Map1.CenterX = FoundFeature.CenterX fMainForm.Map1.CenterY = FoundFeature.CenterY End If b,SQL语句方法Dim ftrs As MapXLib.FeaturesDim lyr As L
44、ayerDim i As IntegerSet lyr = fMainForm.Map1.Layers(RoadlyrName)Dim strs As Stringstrs = Trim(路线编码 = + Chr(34) + ComRoadID.List(ComRoadID.ListIndex) + Chr(34)在值前面加双引号如:ID=001, 观测点名称 like %天平庄 Set ftrs = lyr.Search(strs) lyr.Selection.ClearSelectionlyr.Selection.Add ftrsIf ftrs.Count 0 ThenfMainForm.
45、Map1.CenterX = ftrs.Item(1).CenterXfMainForm.Map1.CenterY = ftrs.Item(1).CenterYEnd If13显示鼠标当前的经纬度Private Sub Map1_MouseMove(Button As Integer, Shift As Integer, x As Single, y As Single)Dim MX As Double, MY As Double Map1.ConvertCoord x, y, MX, MY, 1 Text1.Item(1).Caption = 当前位置 Text1.Item(2).Capti
46、on = 东经 & Format(MX, #0.0000) + ,北纬 + Format(MY, #0.0000) Text1.Item(3).Caption = 当前图层 Text1.Item(4).Caption = Map1.Layers(1).NameEnd Sub14自动滚屏Private Sub Map1_MouseMove(Button As Integer, Shift As Integer, x As Single, y As Single)If mnuMoveCenter.Checked = True Then If x Map1.MapScreenWidth - 10 T
47、hen Map1.CenterX = Map1.CenterX + 0.05 Map1.Refresh Else If x Map1.MapScreenHeight - 10 Then Map1.CenterY = Map1.CenterY - 0.05 Map1.Refresh Else If y 1 Then For i = 2 To Points.Count DistanceSoFar = DistanceSoFar + Map1.Distance(Points.Item(i).x, Points.Item(i).y, Points.Item(i - 1).x, Points.Item(
48、i - 1).y) Next End If If flags = miPolyToolEnd Then First, clear the status bar Text1.Item(4).Caption = MsgBox 距离: & DistanceSoFar & & RulerUnitString Else Text1.Item(3).Caption = 距离 Text1.Item(4).Caption = DistanceSoFar & & RulerUnitString End If End If If ToolNum = PolyAreaToolID Then 面积 Map1.Area
49、Unit = miUnitSquareKilometer On Error Resume Next Dim apolygoN As New MapXLib.Feature Dim ax As Double If (Points.Count 2) Then Set apolygoN = New Feature Set apolygoN = Map1.FeatureFactory.CreateRegion(Points) ax = apolygoN.Area MsgBox 面积: & ax End If End IfEnd Sub1如何修改柱状专题图的样式?Map1.DataSets.Item(D
50、sName).Themes(trafficflubar).Properties.Size = BarSizeMap1.DataSets.Item(DsName).Themes(trafficflubar).Properties.BarWidth = BarWidthMap1.DataSets.Item(DsName).Themes(trafficflubar).ThemeProperties.MultivarCategories.Item(1).style.RegionColor = SmallTruck_Color2如何修改饼状专题图的样式?Map1.DataSets.Item(DsName
51、).Themes(trafficflupiebar).Properties.Size = PieBarSizeMap1.DataSets.Item(DsName).Themes(trafficflupiebar).Properties.Width = PieBarWidthMap1.DataSets.Item(DsName).Themes(trafficflupiebar).ThemeProperties.MultivarCategories.Item(1).style.RegionColor = SmallTruck_Color3如何修改标注的样式?Set oStyle = New MapXLib.style oStyle.TextFont.Size = 12 oStyle.TextFont.Bold = True oStyle.SymbolFontColor = vbWhite oStyle.TextFontBackColor = vbBlue oStyle.TextFontOpaque = True Map1.Annotations.AddText(rs(showfield), lyr.Selection(1).CenterX, lyr.Selection(1).CenterY, 3).Graphic.style = oStyle (白字黑底)
- 温馨提示:
1: 本站所有资源如无特殊说明,都需要本地电脑安装OFFICE2007和PDF阅读器。图纸软件为CAD,CAXA,PROE,UG,SolidWorks等.压缩文件请下载最新的WinRAR软件解压。
2: 本站的文档不包含任何第三方提供的附件图纸等,如果需要附件,请联系上传者。文件的所有权益归上传用户所有。
3.本站RAR压缩包中若带图纸,网页内容里面会有图纸预览,若没有图纸预览就没有图纸。
4. 未经权益所有人同意不得将文件中的内容挪作商业或盈利用途。
5. 装配图网仅提供信息存储空间,仅对用户上传内容的表现方式做保护处理,对用户上传分享的文档内容本身不做任何修改或编辑,并不能对任何下载内容负责。
6. 下载文件中如有侵权或不适当内容,请与我们联系,我们立即纠正。
7. 本站不保证下载资源的准确性、安全性和完整性, 同时也不承担用户因使用这些下载资源对自己和他人造成任何形式的伤害或损失。
