 Foxtable所有范例代码

《Foxtable所有范例代码》由会员分享,可在线阅读,更多相关《Foxtable所有范例代码(274页珍藏版)》请在装配图网上搜索。
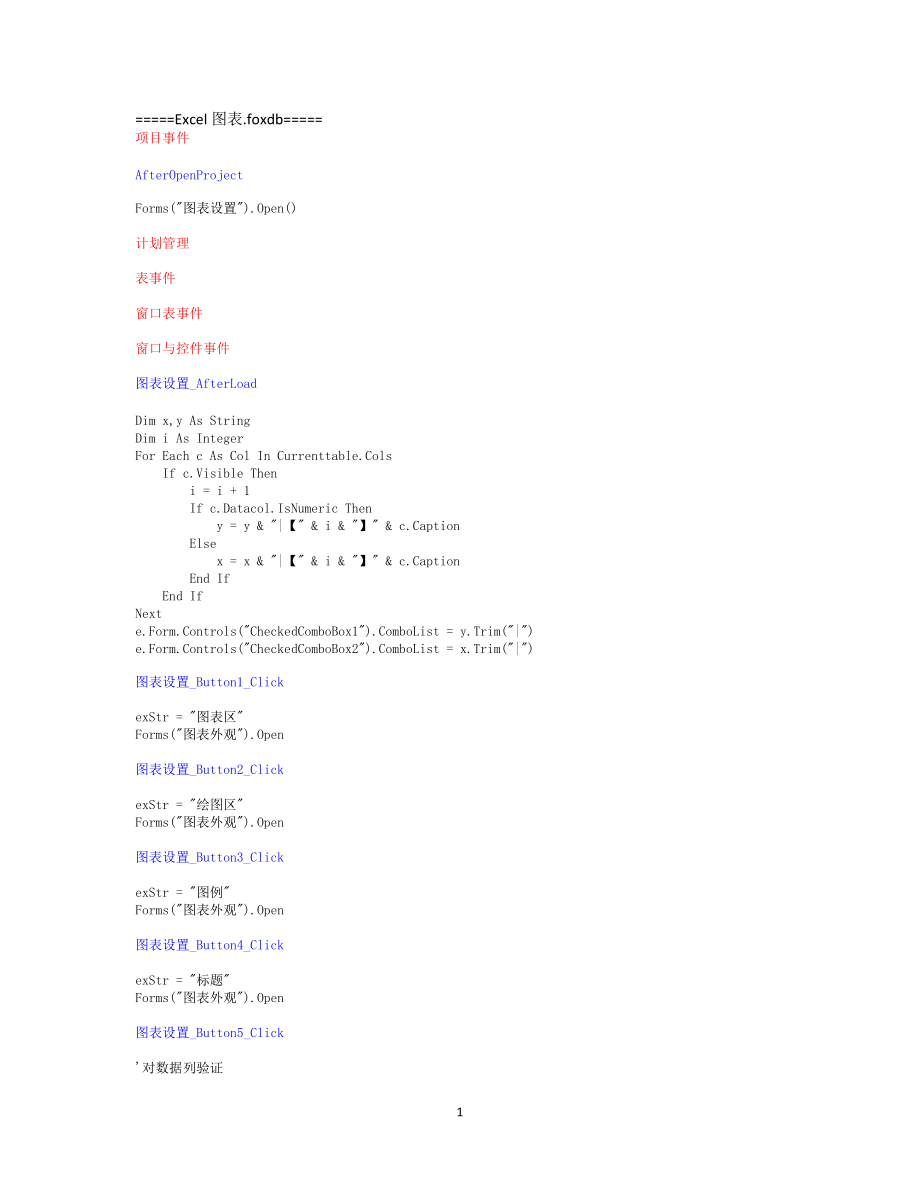
1、=Excel图表.foxdb=项目事件AfterOpenProjectForms(图表设置).Open()计划管理表事件窗口表事件窗口与控件事件图表设置_AfterLoadDim x,y As StringDim i As IntegerFor Each c As Col In Currenttable.Cols If c.Visible Then i = i + 1 If c.Datacol.IsNumeric Then y = y & |【 & i & 】 & c.Caption Else x = x & |【 & i & 】 & c.Caption End If End IfNexte.
2、Form.Controls(CheckedComboBox1).ComboList = y.Trim(|)e.Form.Controls(CheckedComboBox2).ComboList = x.Trim(|)图表设置_Button1_ClickexStr = 图表区Forms(图表外观).Open图表设置_Button2_ClickexStr = 绘图区Forms(图表外观).Open图表设置_Button3_ClickexStr = 图例Forms(图表外观).Open图表设置_Button4_ClickexStr = 标题Forms(图表外观).Open图表设置_Button5_C
3、lick对数据列验证Dim y As String = e.Form.Controls(CheckedComboBox1).ValueDim x As String = e.Form.Controls(CheckedComboBox2).ValueIf y = Then MessageBox.Show(数据系列中的数值轴(Y)必须设置! ,信息提示,MessageBoxButtons.OK,MessageBoxIcon.Warning) ReturnElse If e.Form.Controls(ListBox1).ComboList = Then MessageBox.Show(数值轴(Y)
4、不能全部设置为次坐标轴! ,信息提示,MessageBoxButtons.OK,MessageBoxIcon.Warning) Return End IfEnd IfDim ksl,jsl As Integer x轴的起始列与结束列If x Then Dim xs As String() = x.Split(,) If xs.Length 1 如果x轴有多列 Dim xsn(xs.Length-1) As Integer For n As Integer = 0 To xs.Length - 1 xsn(n) = xs(n).SubString(1,xs(n).LastIndexOf(】)-1
5、) Next Array.Sort(xsn) 得到各列的序号,并排序 For n As Integer = 1 To xsn.Length - 1 If xsn(n) - xsn(n-1) 1 MessageBox.Show(如果X轴的分类列有多个, 那么它必须是连续的! ,信息提示,MessageBoxButtons.OK,MessageBoxIcon.Warning) Return End If Next ksl = xsn(0) jsl = xsn(xsn.Length-1) Else ksl = x.SubString(1,x.LastIndexOf(】)-1) jsl = ksl E
6、nd IfEnd If定义ExcelDim f As String = ProjectPath & Excel数据.xlsDim t As Table = CurrentTableDim flg As New SaveExcelFlagsflg.CellStyle = Truet.SaveExcel(f,t.Name,flg) 导出数据到指定文件Dim App As New MSExcel.ApplicationApp.DisplayAlerts = FalseDim Wb As MSExcel.WorkBook = App.WorkBooks.Open(f)Dim Ws As MSExcel
7、.WorkSheet = Wb.WorkSheets(1)Dim i As Integer = e.Form.Controls(NumericComboBox1).Value 指定大小Dim j As Integer = e.Form.Controls(NumericComboBox2).ValueDim rg As MSExcel.Range = Ws.Cells(t.HeaderRows + t.Rows.Count,1)Dim Co As MSExcel.ChartObject = Ws.ChartObjects.Add(rg.Left,rg.Top,i,j) 在最末行的第一个单元格处生
8、成图表Ws.DrawingObjects(1).Shadow = e.Form.Controls(CheckBox1).Checked 阴影Ws.DrawingObjects(1).RoundedCorners = e.Form.Controls(CheckBox2).Checked 圆角Dim Cht As MSExcel.Chart = Co.ChartFunctions.Execute(App_Wgsz,图表区,Wb,Cht,1,2,3) 设置图表区外观,此行不能放到后面,否则将替代其它对象的设置图表类型并指定y轴和绘图方式Cht.ChartType = Functions.Execut
9、e(App_ChartType,e.Form.Controls(ComboBox1).Value,e.Form.Controls(ComboBox2).Value)Dim cs As String() = y.Split(,)Dim lh As IntegerDim ar As StringDim first As Integer = CurrentTable.HeaderRows + 1 数据记录的起始行Dim last As Integer = CurrentTable.HeaderRows + CurrentTable.Rows.Count 数据记录的结束行For Each c As S
10、tring In cs lh = c.SubString(1,c.LastIndexOf(】)-1) ar = ar & , & Functions.Execute(App_ColChr,lh) & first & : & Functions.Execute(App_ColChr,lh) & lastNextar = ar.Trim(,)rg = Ws.Range(ar)If e.Form.Controls(ComboBox2).Value.Contains(饼图) Then Dim ars As String() = ar.Split(,) If ars.Length 1 Then rg =
11、 Ws.Range(ars(0) End IfEnd IfIf e.Form.Controls(CheckBox10).Checked Then Cht.SetSourceData(rg,MSExcel.XlRowCol.xlColumns) 数据产生自列Else Cht.SetSourceData(rg,MSExcel.XlRowCol.xlRows) 数据产生于行End IfFunctions.Execute(App_Wgsz,绘图区,Wb,Cht,4,5,6) 绘图区的外观设置指定x轴的分类列区域Dim xbz As StringIf x Then xbz = = & Ws.Name &
12、 !R & first & C & ksl & :R & last & C & jsl If e.Form.Controls(CheckBox5).Checked Then 合并单元格 For m As Integer = jsl To ksl Step -1 Dim hh As Integer = first For n As Integer = first+1 To last+1 If Ws.Cells(n,m).Value Ws.Cells(hh,m).Value Then rg = Ws.Range(Ws.Cells(hh,m),Ws.Cells(n-1,m) If m = ksl T
13、hen rg.Merge rg.VerticalAlignment = MSExcel.Constants.xlCenter hh = n Elseif Ws.Cells(n,m-1).Value = Ws.Cells(hh,m-1).Value Then rg.Merge rg.VerticalAlignment = MSExcel.Constants.xlCenter hh = n End If End If Next Next End IfEnd If设置每个数据系列Dim czb As String = e.Form.Controls(CheckedComboBox3).ValueDi
14、m czbs As New List(Of String) 次坐标轴集合If czb Then czbs.AddRange(czb.Split(,)End IfDim s As MSExcel.SeriesDim ys As Integer = 15 颜色序号从15开始For n As Integer = 1 To cs.Length If e.Form.Controls(ComboBox2).Value.Contains(饼图) Then If n 1 Then Exit For End If End If s = Cht.SeriesCollection(n) If x Then s.XV
15、alues = xbz 指定对应的x轴 End If s.Name = cs(n-1).SubString(cs(n-1).LastIndexOf(】)+1) 系列名称 If czbs.Contains(cs(n-1) 如果在次坐标集合中找到对应的内容 s.AxisGroup = 2 End If Functions.Execute(App_Series,数据系列_ & s.Name,Wb,s,ys+1,ys+2,ys+3) ys = ys+3Next设置坐标轴If e.Form.Controls(ComboBox1).Value 饼图 Then Dim y1min,y1max,y2min,y
16、2max As Integer 设置刻度 If czb Then 如果有主轴和次轴就要分别设置 ar = Dim br As String Dim lst1() As String = e.Form.Controls(ListBox1).Combolist.Split(Chr(13) Dim lst2() As String = e.Form.Controls(ListBox2).Combolist.Split(Chr(13) For Each c As String In lst1 lh = c.SubString(1,c.LastIndexOf(】)-1) ar = ar & , & Fu
17、nctions.Execute(App_ColChr,lh) & first & : & Functions.Execute(App_ColChr,lh) & last Next For Each c As String In lst2 lh = c.SubString(1,c.LastIndexOf(】)-1) br = br & , & Functions.Execute(App_ColChr,lh) & first & : & Functions.Execute(App_ColChr,lh) & last Next rg = Ws.Range(ar.Trim(,) y1min = App
18、.WorksheetFunction.Min(rg) y1max = App.WorksheetFunction.Max(rg) With Cht.Axes(MSExcel.XlAxisType.xlValue) .MinimumScale = y1min .MaximumScale = y1max End With rg = Ws.Range(br.Trim(,) y2min = App.WorksheetFunction.Min(rg) y2max = App.WorksheetFunction.Max(rg) With Cht.Axes(MSExcel.XlAxisType.xlValu
19、e,2) .MinimumScale = y2min .MaximumScale = y2max End With Else 否则只要设置主轴刻度 y1min = App.WorksheetFunction.Min(Ws.Range(ar) y1max = App.WorksheetFunction.Max(Ws.Range(ar) With Cht.Axes(MSExcel.XlAxisType.xlValue) .MinimumScale = y1min .MaximumScale = y1max End With End If If e.Form.Controls(CheckBox11)
20、.Checked And e.Form.Controls(TextBox3).Value Then With Cht.Axes(MSExcel.XlAxisType.xlCategory) 设置X轴标题网格 .HasTitle = True .AxisTitle.Text = e.Form.Controls(TextBox3).Value .HasMajorGridlines = e.Form.Controls(CheckBox12).Checked .HasMinorGridlines = e.Form.Controls(CheckBox13).Checked End With End If
21、 If e.Form.Controls(CheckBox6).Checked And e.Form.Controls(TextBox1).Value Then With Cht.Axes(MSExcel.XlAxisType.xlValue,1) 设置Y主轴标题网格 .HasTitle = True .AxisTitle.Text = e.Form.Controls(TextBox1).Value .HasMajorGridlines = e.Form.Controls(CheckBox7).Checked .HasMinorGridlines = e.Form.Controls(CheckB
22、ox8).Checked End With End If If e.Form.Controls(CheckBox9).Enabled And e.Form.Controls(CheckBox9).Checked And e.Form.Controls(TextBox2).Value Then With Cht.Axes(MSExcel.XlAxisType.xlValue,2) 设置Y次轴标题网格 .HasTitle = True .AxisTitle.Text = e.Form.Controls(TextBox2).Value End With End IfEnd If图例Dim sfxs
23、As Boolean = e.Form.Controls(CheckBox3).CheckedCht.HasLegend = sfxsIf sfxs Then Functions.Execute(App_Wgsz,图例,Wb,Cht,7,8,9)End If标题sfxs = e.Form.Controls(CheckBox4).CheckedCht.HasTitle = sfxsIf sfxs Then Functions.Execute(App_Wgsz,标题,Wb,Cht,10,11,12)End If显示表格sfxs = e.Form.Controls(CheckBox14).Check
24、edCht.Hasdatatable = sfxsApp.Visible = True图表设置_Button6_ClickDim cb As WinForm.CheckedComboBox = e.Form.Controls(CheckedComboBox3)Dim tblx As String = e.Form.Controls(ComboBox2).ValueIf tblx.Contains(三维) Or tblx.Contains(饼图) Or tblx.Contains(圆柱) Or tblx.Contains(圆锥) Or tblx.Contains(棱锥) Then cb.Enab
25、led = False cb.Value = Else cb.Enabled = TrueEnd If数据系列Dim z As String = e.Form.Controls(CheckedComboBox1).ValueDim zs As String()If z Then zs = z.Split(,) If zs.Length 1 Then cb.ComboList = z.Replace(,|) Else cb.Value = End IfElse cb.Value = End IfDim c As String = cb.ValueIf c Then e.Form.Controls
26、(CheckBox9).Enabled = True zs = z.Split(,) 所有数据列集合 Dim zls As New List(Of String) zls.AddRange(zs) Dim cs As String() = c.Split(,) 次轴数据列集合 Dim cls As New List(Of String) cls.AddRange(cs) For i As Integer = 0 To cls.Count - 1 Dim va As String = cls(i) If zls.Contains(va) Then zls.Remove(va) Else cls.
27、Remove(va) End If Next Dim zxx As String If zls.Count 0 Then For Each cn As String In zls zxx = zxx & | & cn Next zxx = zxx.Trim(|) End If e.Form.Controls(ListBox1).ComboList = zxx zxx = If cls.Count 0 Then For Each cn As String In cls zxx = zxx & | & cn Next zxx = zxx.Trim(|) End If e.Form.Controls
28、(ListBox2).ComboList = zxxElse If z Then e.Form.Controls(ListBox1).ComboList = z.Replace(,|) End If e.Form.Controls(ListBox2).ComboList = e.Form.Controls(CheckBox9).Enabled = FalseEnd If图表设置_Button7_Clicke.Form.Close图表设置_CheckBox11_CheckedChangede.Form.Controls(TextBox3).Enabled = e.Sender.Checkede.
29、Form.Controls(CheckBox12).Enabled = e.Sender.Checkede.Form.Controls(CheckBox13).Enabled = e.Sender.Checked图表设置_CheckBox3_CheckedChangede.Form.Controls(Button3).Enabled = e.Sender.Checked图表设置_CheckBox4_CheckedChangede.Form.Controls(Button4).Enabled = e.Sender.Checked图表设置_CheckBox6_CheckedChangede.For
30、m.Controls(TextBox1).Enabled = e.Sender.Checkede.Form.Controls(CheckBox7).Enabled = e.Sender.Checkede.Form.Controls(CheckBox8).Enabled = e.Sender.Checked图表设置_CheckBox9_CheckedChangede.Form.Controls(TextBox2).Enabled = e.Sender.Checked图表设置_CheckedComboBox1_TextChangede.Form.Controls(Button6).PerformC
31、lick图表设置_CheckedComboBox2_TextChangedDim cb As WinForm.CheckBox = e.Form.Controls(CheckBox5)cb.Enabled = Falsecb.Checked = FalseDim xx As String = e.Sender.ValueIf xx Then cb.Enabled = True cb.Checked = TrueEnd If图表设置_CheckedComboBox3_TextChangede.Form.Controls(Button6).PerformClick图表设置_ComboBox1_Va
32、lueChangedDim lst As String = Functions.Execute(App_Charts,e.Sender.Value)e.Form.Controls(ComboBox2).ComboList = lstDim lsts As String() = lst.Split(|)e.Form.Controls(ComboBox2).Value = lsts(0)图表设置_ComboBox2_ValueChangede.Form.Controls(Button6).PerformClick图表设置_ListBox1_DoubleClickDim v As String =
33、e.Sender.ValueIf v Then v = v.SubString(v.IndexOf(】)+1) exStr = Z数据系列_ & v Forms(图表数据系列).OpenEnd If图表设置_ListBox2_DoubleClickDim v As String = e.Sender.ValueIf v Then v = v.SubString(v.IndexOf(】)+1) exStr = C数据系列_ & v Forms(图表数据系列).OpenEnd If图表数据系列_AfterLoadDim lx As String = exStrIf lx.SubString(0,1
34、) = Z Then 如果是主轴的数据系列,不允许设置类型 e.Form.Controls(GroupBox1).Enabled = False If Forms(图表设置).Controls(ComboBox1).Value = 饼图 Then e.Form.Controls(CheckBox3).Enabled = True End IfEnd Iflx = lx.SubString(lx.IndexOf(_)+1)e.Form.Text = 数据系列【 & lx & 】格式设置Dim f As String = ProjectPath & NetChart数据系列_ & lx & .tx
35、tIf FileSys.FileExists(f) Then Dim vs As String() = FileSys.ReadAllText(f).Split() Dim v As String = vs(1) vs = v.Split(,) 系列名称 e.Form.Controls(TextBox1).Value = vs(0) 图表类型 Dim lxs As String() = Functions.Execute(App_ChartNum,vs(1).Split(,) e.Form.Controls(ComboBox1).Value = lxs(0) e.Form.Controls(C
36、omboBox2).Value = lxs(1) 数据标签 e.Form.Controls(CheckBox1).Checked = vs(2) e.Form.Controls(CheckBox2).Checked = vs(3) e.Form.Controls(CheckBox3).Checked = vs(4) 分色显示 e.Form.Controls(CheckBox4).Checked = vs(5)Else e.Form.Controls(TextBox1).Value = lxEnd IfIf e.Form.Controls(CheckBox3).Enabled = False T
37、hen e.Form.Controls(CheckBox3).Checked = FalseEnd If图表数据系列_Button1_ClickForms(图表外观).Open图表数据系列_Button2_ClickDim xlmc As String = e.Form.Controls(TextBox1).ValueIf xlmc = Then MessageBox.Show(数据系列名称不能为空! ,信息提示,MessageBoxButtons.OK,MessageBoxIcon.Warning) ReturnElseif xlmc.Contains(,) Then MessageBox.
38、Show(数据系列名称中不能包含半角逗号! ,信息提示,MessageBoxButtons.OK,MessageBoxIcon.Warning) ReturnEnd IfDim tblx As Integer = Functions.Execute(App_ChartType,e.Form.Controls(ComboBox1).Value,e.Form.Controls(ComboBox2).Value)Dim flmc As Boolean = e.Form.Controls(CheckBox1).CheckedDim sz As Boolean = e.Form.Controls(Che
39、ckBox2).CheckedDim bfb As Boolean = e.Form.Controls(CheckBox3).CheckedDim fs As Boolean = e.Form.Controls(CheckBox4).Checked保存设置Dim str As String = xlmc & , & tblx & , & flmc & , & sz & , & bfb & , & fsDim f As String = ProjectPath & NetChart & exStr.SubString(1) & .txt 保存文件名If Not FileSys.FileExist
40、s(f) Then If Not FileSys.DirectoryExists(ProjectPath & NetChart) Then FileSys.CreateDirectory(ProjectPath & NetChart) End If str = 宋体,0,9,0,0,0,0,0,0,0,3,255,255,255,False,True,4,False,13,False,靠右 & strElse Dim vs As String() = FileSys.ReadAllText(f).Split() Dim qtz As String = vs(0) str = qtz & & s
41、trEnd IfFileSys.WriteAllText(f,str,False)e.Form.Close图表数据系列_Button3_Clicke.Form.Close图表数据系列_ComboBox1_ValueChangedDim lst As String = Functions.Execute(App_Charts,e.Sender.Value)Dim lsts As String() = lst.Split(|)lst = For Each l As String In lsts If Not l.Contains(三维) Then lst = lst & | & l End IfN
42、extlst = lst.Trim(|)e.Form.Controls(ComboBox2).ComboList = lstlsts = lst.Split(|)e.Form.Controls(ComboBox2).Value = lsts(0)图表外观_AfterLoadDim lx As String = exStre.Form.Text = 【 & lx & 】项目设置If lx.Contains(数据系列) Then e.Form.Text = 【 & lx.SubString(lx.IndexOf(_)+1) & 】项目设置 lx = lx.SubString(1)End IfIf
43、lx = 绘图区 Then e.Form.Controls(GroupBox3).Enabled = FalseEnd IfIf lx 标题 Then e.Form.Controls(GroupBox4).Enabled = FalseEnd IfIf lx 图例 Then e.Form.Controls(GroupBox5).Enabled = FalseEnd IfDim f As String = ProjectPath & NetChart & lx & .txtIf FileSys.FileExists(f) Then Dim vs As String() = FileSys.Rea
44、dAllText(f).Split(,) If lx.Contains(数据系列) Then vs = FileSys.ReadAllText(f).Split() Dim szz As String = vs(0) vs = szz.Split(,) End If 字体 Dim zt1 As String = vs(0) Dim zt2 As FontStyle = vs(1) Dim zt3 As Integer = vs(2) e.Form.Controls(TextBox1).Font = New Font(zt1,zt3,zt2) e.Form.Controls(TextBox1).
45、ForeColor = Color.FromARGB(vs(3),vs(4),vs(5) 边框样式 Dim ss As String() = e.Form.Controls(ComboBox1).ComboList.Split(Chr(13) e.Form.Controls(ComboBox1).Value = ss(vs(6) 边框颜色 e.Form.Controls(ColorLabel1).BackColor = Color.FromARGB(vs(7),vs(8),vs(9) 边框粗细 ss = e.Form.Controls(ComboBox2).ComboList.Split(Ch
46、r(13) e.Form.Controls(ComboBox2).Value = ss(vs(10)-1) 填充颜色 e.Form.Controls(ColorLabel2).BackColor = Color.FromARGB(vs(11),vs(12),vs(13) 是否启用填充效果 e.Form.Controls(CheckBox1).Checked = vs(14) 渐变方向 e.Form.Controls(RadioButton1).Checked = vs(15) ss = e.Form.Controls(ComboBox3).ComboList.Split(Chr(13) If
47、vs(16) = 7 Then e.Form.Controls(ComboBox3).Value = 中心辐射 Else e.Form.Controls(ComboBox3).Value = ss(vs(16)-1) End If 纹理图案 e.Form.Controls(RadioButton2).Checked = vs(17) ss = e.Form.Controls(ComboBox4).ComboList.Split(Chr(13) e.Form.Controls(ComboBox4).Value = ss(vs(18)-1) 背景图片 e.Form.Controls(RadioBu
48、tton3).Checked = vs(19) e.Form.Controls(TextBox2).Value = vs(20) 标题 e.Form.Controls(TextBox3).Value = vs(21) 图例 e.Form.Controls(ComboBox5).Value = vs(22)End If图表外观_Button1_Clicke.Form.Close图表外观_Button2_ClickDim s As New Windows.Forms.FontDialogs.ShowColor = Trues.Font = e.Form.Controls(TextBox1).Fon
49、ts.Color = e.Form.Controls(TextBox1).ForeColorIf s.ShowDialog = DialogResult.OK Then e.Form.Controls(TextBox1).Font = s.Font e.Form.Controls(TextBox1).ForeColor = s.ColorEnd If图表外观_Button4_ClickDim style,weight,gradient,texture As IntegerDim r1,g1,b1,r2,g2,b2,r3,g3,b3 As Integer字体设置Dim fn As String
50、= e.Form.Controls(TextBox1).Font.NameDim fs As Integer = e.Form.Controls(TextBox1).Font.StyleDim fsize As Integer = e.Form.Controls(TextBox1).Font.SizeDim RGBColor As Color = e.Form.Controls(TextBox1).ForeColorr1 = RGBColor.Rg1 = RGBColor.Gb1 = RGBColor.B边框样式Select e.Form.Controls(ComboBox1).Value C
51、ase 无 style = 0 Case 实线 style = 1 Case 不连续线 style = 2 Case 单点连续线 style = 3 Case 单点单线结合 style = 4 Case 双点单线结合 style = 5End Select边框颜色RGBColor = e.Form.Controls(ColorLabel1).BackColorr2 = RGBColor.Rg2 = RGBColor.Gb2 = RGBColor.B边框粗细Select e.Form.Controls(ComboBox2).Value Case 最细 weight = 1 Case 细 weig
52、ht = 2 Case 中等 weight = 3 Case 粗 weight = 4End Select填充颜色RGBColor = e.Form.Controls(ColorLabel2).BackColorr3 = RGBColor.Rg3 = RGBColor.Gb3 = RGBColor.B渐变方向Select e.Form.Controls(ComboBox3).Value Case 水平 gradient = 1 Case 垂直 gradient = 2 Case 斜上 gradient = 3 Case 斜下 gradient = 4 Case 角部辐射 gradient = 5 Case 中心辐射 gradient = 7End Select纹理图案Select e.Form.Controls(ComboBox4).Value Case 纸莎草纸 texture = 1 Case 画布 texture = 2 Case 斜纹布 texture = 3 Case 编织物 texture = 4 Case 水滴 texture = 5 Case 纸袋 texture = 6 Case 鱼类化石 texture = 7 Case 沙滩 textu
- 温馨提示:
1: 本站所有资源如无特殊说明,都需要本地电脑安装OFFICE2007和PDF阅读器。图纸软件为CAD,CAXA,PROE,UG,SolidWorks等.压缩文件请下载最新的WinRAR软件解压。
2: 本站的文档不包含任何第三方提供的附件图纸等,如果需要附件,请联系上传者。文件的所有权益归上传用户所有。
3.本站RAR压缩包中若带图纸,网页内容里面会有图纸预览,若没有图纸预览就没有图纸。
4. 未经权益所有人同意不得将文件中的内容挪作商业或盈利用途。
5. 装配图网仅提供信息存储空间,仅对用户上传内容的表现方式做保护处理,对用户上传分享的文档内容本身不做任何修改或编辑,并不能对任何下载内容负责。
6. 下载文件中如有侵权或不适当内容,请与我们联系,我们立即纠正。
7. 本站不保证下载资源的准确性、安全性和完整性, 同时也不承担用户因使用这些下载资源对自己和他人造成任何形式的伤害或损失。
